For information about the box office equipment you need, click here: Box office Equipment.
Setting/resetting a password

1. Select the ‘Box Office and ticket scanning’ option in the admin area.
2. Type in your new password and confirm it by typing it again in the box beneath.
3. Ensure to click on Save Changes!
Accessing the box office

1. Select the green 'Go to box office now' button
2. Enter in your box office password
3. Click 'Login'
(Copy and paste the web link, just above the green button, if you want others to access the box office but not the organiser dashboard)
Scanning Tickets

The Box Office homepage provides the following function:
Scan ticket barcodes: go to ticket scanning (require a connected barcode scanner. For queries regarding scanning devices, please contact your sales representative)
Ticket sales: Toolset for selling tickets at door
Search tickets: Look up ticket holder by booking reference, name, email address or postcode
Door list: Generate guest list of all/certain ticket types
Reports: Generate reports on ticket sales, tickets scanned at door, or reports on group bookings
Scanning tickets can be achieved by attaching a barcode scanner (can be purchased from Amazon for about $20/£15) to a laptop or tablet.
1. Select 'Scan ticket barcodes' option
2. Simply scan any of the barcodes on the ticket
Scanning a barcode will check if the ticket is valid and give a positive or negative result along with a sound.
The barcode isn’t scanning!
If the barcode will not scan correctly or the ticket appears to be expired, you can check the validity of the ticket by searching for tickets.
Understanding the tickets
All tickets have been issued in the style below and can be either printed or displayed on a mobile device.
1. Square QR code: We recommend scanning the QR code as this is designed to work best with both mobile devices and poorly printed tickets.
2. Linear barcodes: These are the same barcode numbers as the QR code and will give you the same result. You may find it difficult to scan these from a mobile device.
3. The booking reference, price paid and lead bookers name.
4. The name of the event page where the ticket was purchased.
If a ticket is scanning as invalid, check the event name on the ticket to ensure you are scanning in the correct box office.
5. The ticket purchased which includes the date & time and type of ticket.

Searching for tickets
You can manually lookup any ticket by searching for the bookers name, email address or postcode. Click the “Problems? search by name, email address or postcode” button beneath the main scanning field.

You will be presented with a list of results, each showing the booker name and ticket types purchased. Select “View booking” once you have located the correct booking.

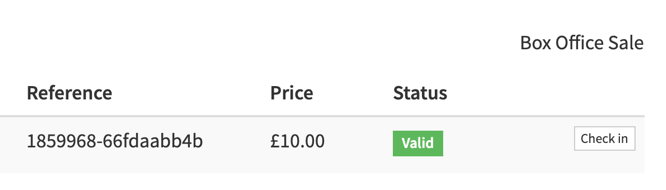
This will take you to the order page for this booking, which will show you all tickets which are part of the booking and the validity of the tickets. From here you can either check in each ticket individually, or check-in the entire order if the group has arrived together.
Want to mute the notification sounds when scanning a ticket? Click the mute button to the bottom right of the scan field.
What happens if I lose internet connectivity? The tickets will continue to validate locally and will upload and sync once you have regained your connection. You will see a notification message at the bottom of the screen stating that you are scanning offline and how many tickets there are to be uploaded.
I’m having trouble scanning mobile phones - Try scanning the square QR code rather than the long barcodes and make sure that the customer has their phone screen set at a legible brightness.
Selling tickets
You can access an event’s door sales function via the event dashboard: Tools section > Box Office and ticket scanning > Go to your Box Office now.


If your event is time-slotted, you will be asked to select the time slot:

You can select the payment method at the bottom of the page:

Cash
If you press cash, the ticket will be purchased immediately. You can also check in the guest right away:

Card
You will be prompted to enter the card details of the customer. Please enter card details as provided by the customer:

After purchase, you can check in the guest right away:
Scanning the QR code
Enable QR scanning by simply downloading any QR reader app on your smartphone.
The QR code can be scanned on the ticket itself which will expire that ticket only or in the customer's confirmation email which will allow you to see all the tickets in the booking and expire the relevant ones.
Notes: You do not need access to the box office if you are scanning a QR code, it will work straight from the app.
You have to enable the QR code for it to be used in the confirmation email
Interactive door list

1. Select 'Door list'
2. Search through the list to find the booking and click the green box to check the booking in.
Multiple bookings under the same name will appear more than once on the list. These correspond to the number of tickets in the booking. Be sure to select all of them if everyone has shown up.
This list is ordered alphabetically by surname and can be ideal for events with a manageable number of attendees.
The door list is compatible with mobile and tablet and can be printed off if you need a hard copy.
Reports

The three report tabs allow you to have an overview of:
- Sales
- Admissions
- Group
The Admissions report can be used to know how many people are checked in - useful if you need this information for emergency services.